
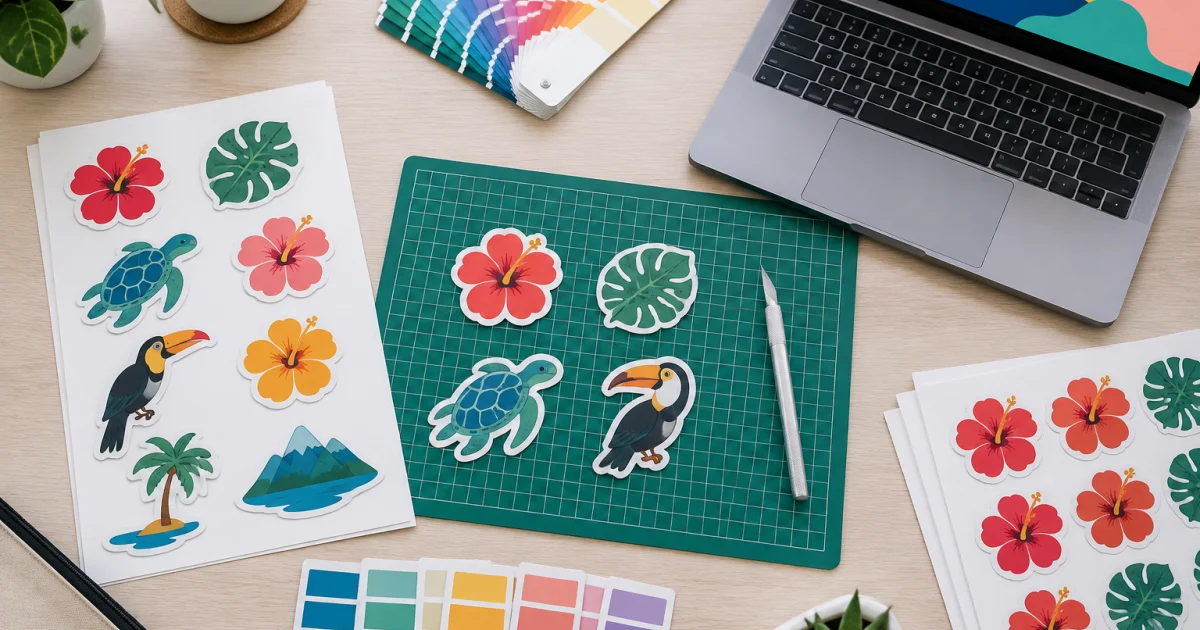

Fast sticker turnaround rarely depends on printing speed alone. Most delays happen before ink hits the material: missing bleed, unclear cutlines, wrong file format, low-resolution images, or artwork built in RGB with colour shifts. For SME owners, marketers, and designers in Penang, submitting truly print-ready files means fewer questions, fewer revisions, and a more predictable schedule.
This tutorial shows how to prepare artwork for sticker printing penang jobs: confirming the sticker format, setting trim/bleed/safe areas, building a usable cutline, choosing practical colour and resolution settings, and exporting files that survive production. Use it to hand off a clean package to your print shop for labels, packaging stickers, warning decals, barcode labels, and promotional die-cut stickers.
1) Confirm the sticker type and finish before you design
Lock the production method first. Sticker format affects margins, safe areas, and how you should deliver cutlines and files.
Decide: roll labels, sheets (kiss-cut), or die-cut singles
- Roll labels: ideal for product labelling and automated application. Keep size consistent, confirm orientation, and ask if they need a specific winding direction. Margins/gaps between labels on a roll matter.
- Kiss-cut sticker sheets: stickers are cut through the face stock, not the backing. Often needs both the sheet outline and the internal kiss-cut lines (multiple stickers per sheet).
- Die-cut singles: cut all the way through. Cutline quality matters most because the edge is the finished product.
Choose your material early (it affects colour and durability)
- Paper labels: cost-effective for dry indoor use; not great for condensation, oil, or wet handling.
- PP labels / polypropylene: common for waterproof/oil-resistant packaging (often used for F&B, cosmetics, household items).
- Transparent/metallic/synthetic/polyester: premium or industrial use; may involve white underprint, laminate, and stronger durability requirements.
Practical example: For a chilli sauce label that will be refrigerated and wiped, start with PP and consider laminate. Designing with “paper assumptions” can lead to fine strokes/light colours that become hard to read on glossy film.
2) Set up your document correctly: size, bleed, and safe area
Most “not print-ready” feedback comes from setup issues. Fix these upfront to eliminate avoidable back-and-forth.
Step 1: Define the final trim size (the cut size)
Your trim size is the exact finished sticker dimension after cutting (e.g., 70 mm × 40 mm, or a custom contour).
- Use millimetres (mm) and design at 1:1 scale.
- Keep orientation consistent across versions.
Step 2: Add bleed (extend artwork beyond the cut)
Bleed is extra artwork beyond the cutline so minor cutting shifts don’t reveal a white edge. Many jobs use 2–3 mm, but confirm your printer’s spec.
- Extend backgrounds, textures, and photos into the bleed area.
- If any coloured shape touches the edge, it needs bleed too.
Practical example: A full-bleed round sticker should have the background colour extend beyond the cut circle (not stop exactly on the cutline).
Step 3: Add a safe area (keep important elements away from the edge)
Safe area is the inner margin where critical elements must stay to avoid looking cramped or being trimmed.
- Keep text/logos 2–3 mm inside the cutline (increase this proportionally for very small stickers).
- Avoid placing thin borders exactly on the cutline; even slight shifts make borders look uneven.
3) Build a proper cutline (die line) the printer can use
A correct cutline is a clean vector path that tells the cutting machine exactly where to cut.
Step 1: Make the cutline a vector path, not an image
- Create the cutline as a vector shape/path (Illustrator, CorelDRAW, etc.).
- Do not submit a flattened JPG/PNG “outline” as a cutline.
- Avoid accidental wobble; cutters reproduce every bump.
Step 2: Keep the cutline on a dedicated layer
- Use clear layer naming (e.g., “CUTLINE” on top, “ARTWORK” below).
- Lock artwork when final to prevent shifts.
Step 3: Use a spot colour for the cutline (when requested)
Many print shops prefer a spot colour named “CutContour”, “DieCut”, etc. Names differ, so ask for their exact convention.
- Use a bright stroke colour for visibility (often magenta).
- Keep stroke thin (about 0.25–0.5 pt) so it doesn’t cover artwork.
- Set cutline overprint only if your printer instructs it.
Step 4: Avoid common cutline problems
- Open paths: cutlines should be closed shapes.
- Double cutlines: overlapping duplicates can confuse cutting software.
- Too many anchor points: simplify paths to avoid jittery cuts.
- Sharp inside corners: small spikes can tear or lift; consider gentle radii where possible.
Practical example: For a logo-shaped die-cut, simplify the contour so curves are smooth and corners are sensible. It cuts cleaner and holds up better during handling.
4) Set colour and resolution correctly to avoid surprises
You can’t control every variable (material and laminate affect appearance), but you can submit files that print predictably.
Step 1: Work in CMYK when possible
- Most printing uses CMYK; designing in RGB can cause late-stage shifts.
- Very bright/neon screen colours may not be reproducible in CMYK.
If brand colour accuracy is strict, discuss expectations early (and ask about spot colours or proofing).
Step 2: Use sufficient resolution for raster elements
- Target 300 dpi at final print size (1:1) for photos/textures.
- Avoid enlarging small images; it will blur/pixelate.
- Use vector logos whenever available.
Practical example: Small round stickers with QR codes or fine text need crisp edges. Keep codes vector where possible and preserve quiet zones so scanning stays reliable.
Step 3: Choose rich black vs 100% K thoughtfully
- Small text often prints sharpest as 100% K.
- Large black fills may look deeper with a rich black mix—ask your printer what they prefer.
Step 4: Expect laminate/material to shift appearance
Gloss can deepen contrast; matte can soften it. Transparent material changes how colour reads depending on what’s behind it. If colour is critical, request a sample/test print.
5) Prepare fonts, strokes, and small details so they print cleanly
These details often trigger delays when printers flag missing fonts or legibility risks.
Step 1: Outline fonts (or package them correctly)
- Outlining prevents font substitution in vector files.
- Keep an editable copy for yourself before outlining.
If you need editable text for frequent SKU updates, ask if the printer accepts packaged files with fonts.
Step 2: Keep type sizes and strokes realistic
- Very thin strokes can break up (especially on textured stocks).
- Reverse text (white on dark) usually needs larger sizes to stay readable.
- On films like PP, fine detail can print well, but results depend on equipment and laminate.
Practical example: Ingredient lists on small cosmetic labels often benefit from a slight size increase and a clean typeface to reduce reprint risk.
Step 3: Avoid unintended overprint/knockout issues
Incorrect overprint settings can make elements disappear or change colour. If you are not intentionally using overprint, keep it off and preview using overprint preview when available.
6) Export the right file format and settings (PDF, AI, or others)
Bad export settings can flatten cutlines, convert spot colours, or downsample images. Match your print shop’s preference whenever possible.
Step 1: Choose a printer-friendly master format
- PDF: widely accepted and stable when exported correctly.
- AI / CDR: sometimes preferred for fully editable vectors and cutlines in the printer’s native workflow.
- EPS: still used occasionally, but PDF is more common for proofing.
If you’re coordinating label sticker printing Malaysia across multiple branches, a well-exported PDF is often easiest to distribute consistently—as long as cutlines/spot colours survive export.
Step 2: PDF export checklist (general best practice)
- Export at 1:1 scale.
- Include bleed (e.g., 3 mm). Add printer marks only if requested.
- Avoid aggressive downsampling; keep raster quality suitable for print.
Cutline check: Re-open the exported PDF to confirm the cutline is still a vector path, sits on top, and bleed is present.
Step 3: Provide both “print” and “proof” files when helpful
- Print file: the production-ready PDF/AI with bleed and cutline.
- Proof reference: a low-res preview showing intended appearance (helps prevent confusion about a bright cutline stroke “printing”).
7) Final preflight: a print-ready checklist before you send
Use this repeatable routine to catch the issues that pause production.
Step-by-step preflight (use this every time)
- Trim size: matches the order (mm), correct orientation.
- Bleed: background extends beyond cutline (per spec, often 2–3 mm).
- Safe area: key text/logos not near the edge.
- Cutline: closed vector path, single line, top layer, clearly named.
- Colour mode: CMYK where possible; spot colours only if intentional.
- Resolution: raster elements are 300 dpi at final size; no pixelation.
- Fonts: outlined or properly packaged; no missing font warnings.
- Overprint: nothing disappears in overprint preview.
- Barcode/QR: correct size/contrast, quiet zone preserved, not distorted.
- Re-open export: confirm nothing changed (bleed/cutline/layers).
Common printer questions you can answer proactively
- Quantity and format: roll vs sheet vs singles; number of designs and sizes.
- Material: paper vs PP labels vs specialty; laminate type (gloss/matte).
- Environment: refrigerated, oily, outdoor, heat/chemical exposure.
- Finishing: kiss-cut vs die-cut, corner radius, sheet size, perforation needs.
Including these details with your file submission reduces follow-ups and speeds scheduling.
8) Practical file-prep examples (what “good” looks like)
Use these scenarios as quick reference when you’re unsure how the rules apply.
Example A: F&B product label (PP label with laminate)
- Sticker type: roll label for bottle application.
- Trim: 80 mm × 50 mm rectangle with 2 mm corner radius.
- Bleed: 3 mm all sides; extend background.
- Safe area: 3 mm internal margin for product name and barcode.
- Colour: CMYK; small text in 100% K.
- Export: print PDF with bleed; cutline on its own layer using the printer’s required spot name.
Why it speeds turnaround: Roll labels rely on consistency. Clear trim, radius, and safe areas reduce die/cut questions and barcode cropping risks.
Example B: Promotional logo sticker (die-cut single)
- Sticker type: die-cut singles for events.
- Trim: contour around logo with smooth curves.
- Bleed: add 2–3 mm only where artwork hits the edge; confirm how “white” is handled (paper white vs white ink on clear).
- Cutline: simplified path; avoid tiny spikes and excess anchor points.
- Export: vector PDF plus a separate proof image.
Why it speeds turnaround: Complex paths get flagged and may cut poorly. A clean contour cuts faster and cleaner.
Example C: Industrial identification label (durable, barcode-forward)
- Sticker type: durable equipment tracking label.
- Key risk: barcode readability plus chemical/heat exposure.
- Design approach: high contrast, generous quiet zones, avoid effects that distort bars/modules.
- File prep: keep barcode vector when possible; don’t stretch or warp codes.
When labels are part of an inventory workflow, teams may also use hardware such as a barcode printer for variable data. Even for pre-printed labels, barcode-friendly design rules help prevent scanning issues later.
Useful next reads and services (for smoother production)
If you’re still deciding between paper vs film, finishes, and durability, this guide can help before you finalise artwork: Best Sticker Materials For Packaging And Branding In Penang.
When you’re ready to produce, align with your supplier’s capabilities and order format. You can review Altrapac’s options for Label Sticker printing and related services via Our Services.
If your project is part of a broader packaging launch (labels + boxes + bags), consolidating specs reduces versioning mistakes. Planning pages: Custom Box Printing and Paper Bag Printing.
Conclusion: submit cleaner files, get faster approvals
Fast turnaround is easier when your sticker artwork is built for production: correct trim size, proper bleed and safe area, a clean vector cutline on its own layer, print-friendly colour mode, and exports that preserve the die line. Add a consistent preflight routine and you’ll reduce revision cycles—especially when managing multiple SKUs, outlets, or urgent launch timelines in Penang.
As an internal SOP, standardise layer names, keep templates for common sizes, and always re-open exported PDFs to confirm nothing broke during export. Your team will spend less time fixing files and more time launching products.
Frequently Asked Questions
What is bleed for sticker printing, and how much do I need?
Bleed is extra artwork that extends past the cut edge so small cutting shifts don’t show an unprinted border. Many sticker jobs use around 2–3 mm bleed, but the exact requirement depends on the printer and the sticker format (roll, sheet, or die-cut). If your design has colour or images reaching the edge, you should include bleed and extend the background beyond the cutline.
How do I provide a cutline (die line) so the printer can cut my stickers correctly?
Provide the cutline as a clean, closed vector path on a dedicated top layer (often named “CUTLINE”). Many printers prefer the cutline stroke to use a specific spot colour name (for example, a “CutContour” style), so it’s best to ask for their exact naming convention. Avoid double cutlines, open paths, and overly complex shapes with too many anchor points.
Should I design stickers in RGB or CMYK?
For most print workflows, CMYK is safer because it reflects how ink is produced. RGB colours can shift when converted for printing, especially very bright or neon tones. If brand colour accuracy is critical, discuss colour expectations with your printer early and consider test prints or colour proofing options.
What file format is best to send for sticker printing in Penang?
A print-ready PDF is commonly accepted and works well when exported correctly with bleed and a preserved vector cutline. Some printers may prefer editable source files (AI or CDR) depending on their workflow. Whichever format you send, re-open the exported file to confirm the cutline is still present, the bleed is included, and nothing has been rasterised unexpectedly.
Can the same artwork be used for labels, boxes, and other packaging in Malaysia?
Often yes, but it should be adapted for each item’s template and production method. Labels may need cutlines and bleed; boxes require dielines, folds, and larger safe areas; bags may need different ink coverage limits. If you’re coordinating multiple items (for example, label sticker printing Malaysia plus boxes), aligning brand colours, typography, and export standards across all files helps reduce revisions and keeps production consistent.
Want faster sticker turnaround? Let Altrapac pre-check your artwork
If you’re preparing files for product labels, packaging stickers, or die-cut promos, Altrapac can help you reduce revisions by confirming key specs like bleed, cutline setup, and export format before printing. With over 30 years of experience and local support in Butterworth, Penang, we’re a one-stop partner for custom label & sticker printing, barcode label printing, and related packaging needs.
Send your artwork details and tell us your sticker size, material (paper or PP labels), finishing (kiss-cut or die-cut), and quantity—our team will guide you toward a print-ready submission for a smoother production flow.